Humble Garden

ReSkilling for future food independence

Archive for the ‘construction’ Category

Using and reusing in the garden

Posted by Nika On October - 23 - 2009

Humble Garden 2009: last resort to keep goats in

(Vermont cart being used as a door stop, go figure)

One of the things about permaculture that really resonates for me is the drive to use everything, to have no waste, to get a yield from as much as you can.

Something about looking at what WAS clutter in my eyes in a new way that makes it a resource, it seems magical. I am one of those people who can not stand clutter but I live with people who seem wholly immune to it.

By opening my eyes to the power of yields and re-use, my brain doesnt see clutter but a riddle.

If you would like to learn more about the 12 permaculture principles you might want to visit this site – Permaculture Principles.com

This is a lovely graphic that they developed, allow it to draw you in and entice you to learn more.

Click to learn more

I had a pile of really sturdy feed bags that I perceived as an eyesore and clutter and garbage – garbage I had to find a way to deliver to the transfer station without too much cost to us.

One day I stood staring at the bags as I was milking the goats and it came to me in a flash, cut open the bags and use them in the sheet mulching method to build the extension to the garden!

Permaculture: 1st bed arc

I had to pause that project because I had used up the feed bags until I had enough for some more beds. Yesterday I put down two more beds but the Vermont cart you see above was in use (we are stacking wood in the basement for heat this winter) so I thought I might be out of luck.

Then I put on my permie-beanie and thought of this ancient wheelbarrow! (it was on the edge of our yard, almost eaten by the forest)

Permaculture: How to use this wheelbarrow

But, it had rotted through even before it was given to us! It was now in sorry shape…

Permaculture: How to use this wheelbarrow

I figured, why not try the brainstorm idea I got, use a tarp to cover the hole…

Permaculture: cover with a tarp!

It worked perfectly well and I was able to move many barrow-loads of compost from the pile to the new beds.

Permaculture: new beds

These beds will get a LOT more compost and then percolate over the winter with a layer of leaves and straw on top. In the spring they will be planted out with a mixture of tender annual vegetables and perennial vegetables.

In between the rows I want to put down wood shavings so as to control the weeds which WILL rule this area if I let it.

Our neighbor is a lumberjack who brings waste wood to his land next to ours and cuts it into wood for heating (sells it). Their waste is wood shavings that have been contaminated with dirt (and thus can not be burned in their biomass generator).

Their waste is our yield!

Today some shavings were brought over and I am looking forward to spreading it around. I think I will need more than this though!

Here are some shots of the delivery.

Permaculture: neighbor delivering shavings

Permaculture: neighbor delivering shavings

Permaculture: neighbor delivering shavings

Permaculture: neighbor delivering shavings

Permaculture: dumping the shavings

Permaculture: waste shavings, to use!

Think about how you can re-purpose and reuse to gain a previously unexpected yield from waste, share it with me!

Permaculture thoughts

Posted by Nika On September - 7 - 2009

Permaculture: 3rd iteration

Am in the process of FINALLY reading my two books on permaculture “Edible Forest Gardens Vol 1 & 2” by Dave Jacke and Eric Toensmeier.

As a result, I have been designing the next phase of the Humble Garden with an eye to increasing food growing space on land that doesnt have much top soil (its on ledge).

My initial design is seen above. Its something that will evolve over time!

I have started work on the first bed, next to the future frog pond. As money is tight, I need to be able to find ways to do this all for free with stuff we already have. Am recycling feed bags for the bottom of the new raised beds and am using the TONS of goat, chicken and llama manure and litter we have. I just need some wood chips and I think I will be set.

This is also very much the way permacultural principles would have you do this.

Inputs:

Permaculture: 1st bed arc - inputs

Llama and manure

Permaculture: 1st bed arc - inputs

Grass clippings (from neighbor)

Permaculture: 1st bed arc - inputs

Chicken and goat manure and litter (compost heap).

The following are a few photos of how the first raised bed was put down, sheet mulching or lasagna garden style.

Permaculture: 1st bed arc

Permaculture: 1st bed arc

Permaculture: 1st bed arc

More grass clippings and layer of llama manure pellets

Permaculture: 1st bed arc

I will be adding more organic material and possibly some lime or ash over time. Next spring this will all have composted down a bit and it should be ready for it’s first year of growing.

I hope to be able to get those other new beds built this summer/fall.

Cold frames, in the cold rain

Posted by Nika On April - 6 - 2009

KD with baby goat

(KD with fast growing kid)

.
Wow, lets talk about hardy plants, yikes! I made or rather, I jury rigged, a cold frame on the raised bed that will hold brassicas (early cabbage, kale, and bok choy) to see if I could get them out there before our last hard frost date of May 15th.

I bought some 4 mil clear plastic and 2 ten foot 1.5 inch diameter plastic pipe. We cut the pipes in half to make 4 five foot lengths for support, in theory that is.

Humble Garden 2009: 4 mi plastic for cold frame

This thickness is strong enough to deal with the elements but clear enough to get solar gain.

Humble Garden 2009: 4 mi plastic for cold frame

I stuck the 5 foot length pipes into the bed, as you see below.

Humble Garden 2009: making a cold frame

Humble Garden 2009: KD and cold frame

And then KD, seen above, and I made holes for the seedlings (I peeled off the peat pots when planting)

Humble Garden 2009: transplanting

Humble Garden 2009: all plants transpanted

And then, using duct tape and varying levels of angry kevetching not rated for young ears, I draped the pipes with plastic.

Humble Garden 2009: Completed cold frame

Humble Garden 2009: Cold frames

One important part of this plastic is to keep the darn chickens who are still free ranging off my plants. As I was planting these seedlings, I turned my back for a few moments and the darn rooster jumped right up and ate 5 bok choys!

As soon as I finished enclosing this bean trellis with plastic and stepped back, that evil rooster jumped right up and proceeded to menace my cold frame. He very deliberately worked hard to find a way in.

I hope you can see him in the photo above. I also have a few other shots below.

Humble Garden 2009: rooster trying to get into coldframe

Humble Garden 2009: rooster trying to get into coldframe

After that beautiful day when I built the cold frame, it has been raining and blowing non-stop. Those poor little seedlings have been subjected to sub-32 weather at night and direct weather exposure because the high winds continue to blow everything off the raised beds! This includes having the plastic directly ON the seedlings with a load of icy cold water pooled above them.

I figured I had lost these poor seedlings but today I ran out in the rain and looked and saw that they had already grown new leaves! Crazy things!

I guess they like this sort of weather (I know they are cold hardy but this is just crazy)

I am very thankful for their resilience and I am looking forward to some VERY hardy cabbages, kale, and bok choy!

My next project is broadcasting carrot seed (with sand) and also getting some broccoli going out there.

Radical Photons

Posted by Nika On February - 2 - 2009

(This was cross posted to two of my other blogs Peaknix and Nika’s Culinaria)

HEAT egg

Recently, I came across a solar cooking wiki and a whole group of YouTube videos about how Africans are adopting parabolic solar cookers in their villages. The importance of this didn’t really sink in for me until I saw how women walk hours through elephant infested nature preserves to find wood that they poach unsustainably. They get chased by angry elephants (its THEIR home after all) and the women spend ALL DAY finding dwindling resources, leaving behind unattended or poorly attended babies and small children.

Parabolic solar cooker
source

In particular, there is the Zambian Mfuwe Solar Cooker Project initiated by Manda Chisanga, a guide in South Luangwa National Park who had won a guiding award and decided to spend his prize money on Solar Cookers.

“The documentary covers the installation of five SunFire14 Parabolic Dishes – the project has been expanded to 15 and we are looking at ways to get 500 Parabolic Dishes into the community to cover 6000 families.” source

parabolic cooker
source

With a parabolic solar cooker, all of these risky and ecologically unsustainable practices are stopped immediately. The women can stay with their kids, young girls can go to school instead of watching babies or collecting wood all day themselves.

If that doesn’t sound radical and revolutionary, you are not thinking it through.

You can learn all about the basic principles of solar cooking and see plans for building your own DIY cooker at the Solar Cooking Wiki. Give it a whirl and see what you think.

I have been wanting to make our own DIY solar oven for ages and have finally scraped together some found objects that we have used to make our first winter relevant solar cooker. No cooking is happening yet because I am still testing it and there was no sun to speak of today! We do this in part as a homeschooling project too so the testing is an important part of it.

If you do this, share! Let me hear about how it is going for you.

DIY Solar Oven

DIY Solar Oven

DIY Solar Oven

Found materials and also some high heat enamel spray (which I bought for this project)

DIY Solar Oven: outer box

Cut to fit insulation on bottom of the oven

DIY Solar Oven: interior box

Crafting, with duct tape, the interior box

DIY Solar Oven: box inside box

Need to trim height of the box

DIY Solar Oven: interior box

Trimmed and taped and ready to be sprayed with enamel

DIY Solar Oven:

DIY Solar Oven:

Sprayed, dried, inside larger box, found insulation in place

Next step is to make all manner of reflectors to sculpt the photons into the oven

DIY Solar Oven: for reflectors

Materials for reflectors

DIY Solar Oven:

Two reflectors made. I rigged up a tape slide holder on the backs so that the reflectors are placed without taping them onto the oven part.

DIY Solar Oven: reflector

Slide holder rig

DIY Solar Oven: one reflector

One reflector rigged up

DIY Solar Oven: testing

DIY Solar Oven: testing

Black covered pot and temperature probes

DIY Solar Oven: testing

Solar oven set up inside as we test it out

DIY Solar Oven: testing

Made a third reflector and started testing positioning (which isn’t really intuitive, more experiential)

I know I could buy a solar oven but what fun is that?! Not terribly frugal either :-)

Once we get a good sunny day I will test it properly and share back here!

Chicken Tractor

Posted by Nika On May - 23 - 2008

making baskets

(KD and plastic egg)

Two weekends ago we got a few things done that I will share here. It was a sunny day on saturday so KD, Q, and I sat in the sun (tho a bit chilly) and started making hay-based baskets. Above you can see KD playing with one in progress, great place for an egg.

making baskets

(Assembly)

These wont last long but it was nice to sit in the sun and play with it. Above you can see KD holding the egg basket with the unfinished rope hanging off to the side.

making baskets

(Such a cutie)

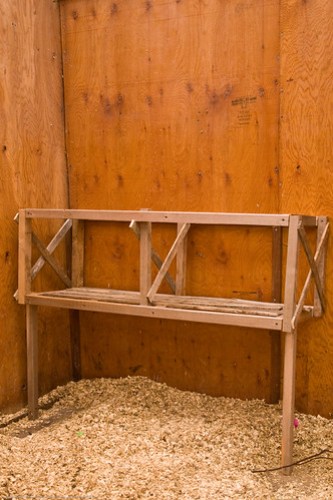
new nest boxes, found parts

(Nest box frame)

I grabbed some garden stakes and such and cobbled together the nest box frame above. Darn chickens love to roost on it and lay eggs UNDER it.

building the chicken tractor

(Making a chicken tractor)

Ed and Q took some other left over used garden lumber stuff and made a chicken tractor. Didnt take them very long. This is just one for our backyard. If you want to do this for the field then it needs to also have a covered section for when it rains, chickens dont like rain much. (neither do goats!)

chicken tractor

(Eating clover)

Chickens, eating clover and grass, in the tractor. Hawks flew overhead but never tested the tractor. Nice to be able to control the grass and then get even more beautiful eggs!

Houston, we have a chicken house

Posted by Nika On October - 22 - 2007


The young chickens have moved into their new chicken house and are loving it. We are enjoying an indian summer here in central MA so they are doing fine with the transition (we also have some heat lamps for when it gets chilly at night and for the coming weeks when fall gets down to business).

Today we are looking at 83 F as a high so I am hoping they stay cool enough. We have yet to finish the outside enclosure but the husband is working as fast as he can to get it done.

Let me know if you cant see the slide show above!

What do you think?

Noodling over nest boxes

Posted by Nika On September - 30 - 2007

The chicklings have arrived and they are growing like crazy. We have them set up in a large enclosure in an upstairs bedroom (that is naturally hot these days) with a heat lamp. Things are getting interesting because they are NOT ready to go outside but the little guys are getting a bit feisty and are deciding to fly on occasion, not a good thing inside one’s house.

Garden Project: chicklings upstairs at home

The little chicks are growing proper feathers now.

Garden Project: older chicklings - feathers

Ed has done a whole lot on the chicken house and its time for me to put in the nest boxes.

Garden Project: chicken house with double walls

Garden Project: making the door

I am working on a set of 5 boxes to start, with room to make more, that will have roll out bottoms that feed to little ramps in the back that then feed to a hole that is accessible from the outside of the house. This way I do not have to open the house to get inside to get eggs and let out a ton of heat in the middle of winter (when its -20 F around here).

I think I am going to use some of the roofing plastic material for the egg ramps in the back. It wont come together for me until I am actually putting the thing together because I am not certain how much of an angle is best to get the eggs to roll but not too fast.

This is rather academic in some ways because the chickies are MONTHS from egg laying. I just want to get the boxes built before we put the little things in the house.

We still have to do the run in the back. Once that is done, they should be big enough to be put out with a heat lamp and perhaps some seedling mats to help them transition.

Avian Abode

Posted by Nika On September - 10 - 2007

chicken house construction

(3/4 view of in-progress chicken house. Front door is rough cut, will be full height)

Tomatoes are coming at us fast and furious, watermelons and squash have met fates which I will write about after this post, sometime soon.

Our attention is turning to the chickens today as I have some photos of the house in progress to share.

What you see above is the house in most of its glory :-/. The front door will be full height and not all topsy turvey like that. Notice the roof, its made of clear plastic roofing material. I didn’t want to build a cave like house so I requested that.

Here is what the ceiling looks like from inside.

The join between the roof and the walls looks like this.

And this.

Let me just say this – do not ask me WHY things were constructed as they were, its just the way my husband felt they needed to be.

This is a shot of the roof from the outside.

All those openings you saw at the top will be sealed with wire mesh. They will be open in the summer to allow cross breezes and then stopped up with insulation in the winter, as needed.

I requested a little manure sweep-out door at the base of one of the walls so that all we need to do to get rid of manure is to open the flap and push the manure and litter out into a waiting wheelbarrow.

Seen here from the inside.

Seen here from the outside.

Wire mesh lies beneath the flooring to inhibit rodents and also the ferocious Fischer cat weasels that we have indigenous to the surrounding forest.

Here you can see some of the foundation to the chicken house.

There is a huge amount of stones in the foundation into which radiant flooring tubing has been buried. It will serve as a heat sink for the radiant heating system, allowing for very low energy input but good returns on temperature control. Those orange tubes are the radiant floor tubing.

We will be painting the interior to waterproof it (and keep chickens away from the pressure treated wood). We will be building a deck in front of it which will also be covered. We will sit on this deck to enjoy the garden and also, around the side, watch the chickens in their back enclosure, if we feel the need.

I will be building roll-away nest boxes that will feed to a central collection point where I will then have a hole made through the wall so that all I have to do is walk up, open a little door in the wall, and pick out the eggs for the day.

I will shoot that when its done.

All gaps and such will be sealed with the wire mesh. We are determined to not lose our chickens to the fox and weasel which have been so awful in previous years.

We are thinking about setting up a motion detector system inside for nighttime to scare away any predators that may have gotten too close to or into the house. I am thinking of rigging up a speaker system that will emit a lion’s roar should we have a break in.

ROFL

It will be tempting to also put up some sort of cam to be able to watch the girls during the day and capture predators in the act of breaking in and then losing their minds when the roar lets loose. (These are all fun ideas which come WAY after getting the darn thing done in the first place!)

Yeah, we are scarred from predator attacks, can you tell?

Its all about the green

Posted by Nika On June - 28 - 2007


(Tomatoes: Bonnies and Seeds of Change heirlooms)

Its been a busy week or so. As you may or may not know, I am a food photographer (as well as many other things) and activities are picking up a bit in that department. In the last week, I have been out to shoot a local BBQ joint called B.T.’s Smokehouse, a lavish fund raiser for Les Dames d’Escoffier at the Allandale Farm in Boston, and a low key wedding in an idyllic landscape.

We have been working away on the garden too.

Yesterday and the day before, we had temperatures in the mid 90s so things have been drying out but growing like gangbusters.


(mesclun, radishes, carrots, collards, tomatoes)

We are proceeding with the chicken house and also the trellising for the now-desperate peas and beans, waiting for something to climb! We will be growing the beans and squash, that are planted with the corn, up strings to get it away from the corn. Will use slings to hold the squash up. High-rise gardening!

Will update with a shot of these when made.


(The three sisters: beans, corn, squash)

I have planted two 16 foot raised beds with many legumes, such as: black beluga lentils, flageolet beans, cranberry beans, turnips, chard, and other species.


(sprouting black beluga lentils)

Our potatoes are planted in their hay dirt-free systems.


(potato patch in the distance)

Our asparagus has popped up through 10 inches of soil and are now ferning out in their first year’s growth.


(tiny asparagus spears, a foot tall and


just before ferning out)

We are getting various patches of grass growing around the house (including the septic field) and are considering the purchase (or planning what we need to support) a dairy animal (jersey or a goat). We love the eggs from chicken but it would be great to close the loop on the milk/butter/yogurt/cheese because we eat so much of it.

From the jersey, we would get milk and manure, something we really need an organic source of. I just have to determine if we can establish enough pasture to feed it and a calf during the summers and afford to overwinter them with outside bought (unfortunately not organic) feeds.

7 beds, all in a row

Posted by Nika On June - 15 - 2007

Oh my goodness! Ed and crew are FINALLY done with the seven raised beds (with internal radiant heating system). You can see them in the photo above.

Now we turn to the chicken house. I will share that process as it comes along.

I am also now going to start seeding the three brand new beds.

I have brainstormed on the placement of the first aquaculture tank and I will share some of that planning as soon as I have it mocked up in a document.

About Me

We are a family of 5, including Nika, Ed, Q (14), KD (7), and Baby Oh (4). We garden 1024 square feet of raised beds plus assorted permacultural plantings. We also have 13 LaMancha dairy goats, 40 chickens, and one guard llama.

Twitter

    Photos

    Essex大学Untitled Flickr photoJacs_Sport_24_12-3205Untitled Flickr photo